When i say simple things to keep in mind while making yogurt, i m talking about a live yogurt culture or a starter, the right temperature of the milk and the amount of culture you use. Many folks have the idea that the more culture you use, the better your yogurt sets. However, this is a very wrong notion. Now, lets come to culture itself. You have two ways to get that live culture- one buy some set yogurt from the store and go from there or two, add a chili stalk or two to 1/4 c of milk and let it stand till curdled and sour for about a day. You can also use a marble sized tamarind or 1/2 tsp vinegar too for making your starter. As for the temperature, the milk to which you add the yogurt must be warm enough so that you can dunk your fingers into for 15 secs at least without wincing. So, shall we go about making yogurt then?
Recipe Index
How To Make Sprinkles At Home
I often embark on crazy adventures, especially in my kitchen. That s how i made these sprinkles at home. The place where i live is not a baker s paradise. So finding fancy sprinkles and cake toppers have always been difficult. While i manage to get all the rudimentary stuff some where near my house, i have to travel almost an hour and a half if i ever run out of sprinkles. Not that we are big sprinkle fans. But, still.
Its only when i visit Coimbatore or Bangalore that i get to pick up some embellishments for all my baked goodies. One fine day, while i just wanted to bake a batch of these fragrant Vanilla cupcakes and frost them for a friend, i realised that my already teeny weeny container of sprinkles was over. I was immediately crest fallen, only to be cheered up by the fact that i had seen many recipes for sprinkles online a while back. Its then that i thought, why not make my own sprinkles? These sprinkles are eggless and really really easy to make. They are also inexpensive and you can easily make them into different shapes or sizes if you please. Do refer my notes for a few tips and tricks before you begin.
- Confectioner s sugar 1 c ( Icing Sugar)
- Corn starch 1.5 tsp
- Lemon juice 1 tsp
- Milk at room temp 2 to 3 tsp
- Different food colors used in baking ( I used blue, pink, yellow, orange and green)*
- Parchment paper
- Piping nozzle size no.1*
- Piping bag*
- Sift the confectioner s sugar and corn starch together twice or thrice ensuring that there are no lumps.
- To this, add lemon juice and 2 tsp of milk in the beginning and mix well. While you may feel that the amount of liquid i ve mentioned here is ridiculously tiny, rest assured that it works well.
- Start with 2 tsp of milk. Use a electric beater and a whisk and whisk the mixture thoroughly.
- You must have a lump free batter. In case you feel the batter is too thick, add the remaining tsp of milk and whisk again.
- Now divide the mixture into equal parts based on the number of colors you are going to use.
- Add a drop of the respective food color into each of the divided part and mix well. Make sure you use different spoons for this. I still have a batch of sprinkles that are neither green nor pink.
- Line a baking tray with parchment paper.
- Fill your piping bags with the icing mixture.
- Now, draw straight lines on the parchment paper by gently squeezing the bag. Just like how you would do a henna design.
- Dont worry if the lines get curvy or wavy. We are going to cut them up later so no sweat there.
- Now, let those colorful lines of icing dry for 24 hours.
- You may be tempted to cheat or take a short cut but its of no avail. They dont come off the sheet easily when they are not dried completely.
- Once dry, take them off the parchment sheet. They wont offer much resistance once fully dry. Try taking a small part out first and in case you find it too difficult, let it dry a little while more.
- Once you have them out of the paper, cut them with a very very sharp knife into small bits.
- Scoop them all up and store them in an air tight container.
Falooda Recipe| Dessert Recipes
What can i say about falooda except that its the first dessert that i tasted as a kid and it has always remained my top dessert choice, no matter where i go. I still remember eating falooda for the whole meal when i was taken out by my dad and mom. While i grew up, i somehow forgot about this amazing dessert. One day, suddenly, just like that, the craving to down a falooda hit me hard in the belly and from then on, its never ended. I made an attempt to make falooda at home a while back and i must say, it felt so good to gorge on more than one falooda.
|
Falooda (Learn to make falooda, a dessert with assorted fruits, vermicelli and ice cream) Prep Time: 10 mins plus 1 hour chilling time Cook Time: 20 mins Allergy Info: Contains nuts and milk
Cuisine: Indian Course: Dessert Yields 2 large glasses
__________________________________________________________________________________
Ingredients
Milk 2 cups boiled and cooled. Notes 1. You can use any flavor of ice cream that you like. Feel free to experiment with two or three flavors. I ve tried mango and banana. Also mango and chocolate work well. In case you use a flavor other than vanilla, dont use rose syrup. Method Preparation Soak the basil seeds in 1/2 c of water for half an hour. Assembly To assemble the falooda, you need two tall and considerable big glasses. |
Badam Milk Recipe| Winter Drink Recipes
And i m not a fan of those powdered badam milk mixes available in the market. I find the flavor overpowering and its almost always full of every other ingredient but almonds. A while back, Mr. P who usually makes a run for it if someone so much as says M of milk, made an unusual request. He expressed his passion for badam milk. It came to me as a surprise but i was glad that he was taking to milk. So, i tried recreating my version of that badam milk that i used to devour in college days. Only, i served it hot as the weather is almost wintry here. This is a perfect welcome drink that can be made in advance for any party. The recipe is very forgiving. You can add as much or as less of any one ingredient. Ultimately, it all boils down to what you like. I mean, isn’t it the same for almost all recipes? Whoever says something has to be done only one way? Food is to relish and its no science, ain’t it?
|
Recipe: Badam Milk
Prep Time:Overnight Cook Time: 10 mins Allergy Info: Gluten free, Soy Free
Cuisine: Indian Course: Drink that can be served at the beginning or end of a meal
Yields 500 ml __________________________________________________________________________________ Ingredients
Almonds 1/2 c soaked overnight and peeled Directions
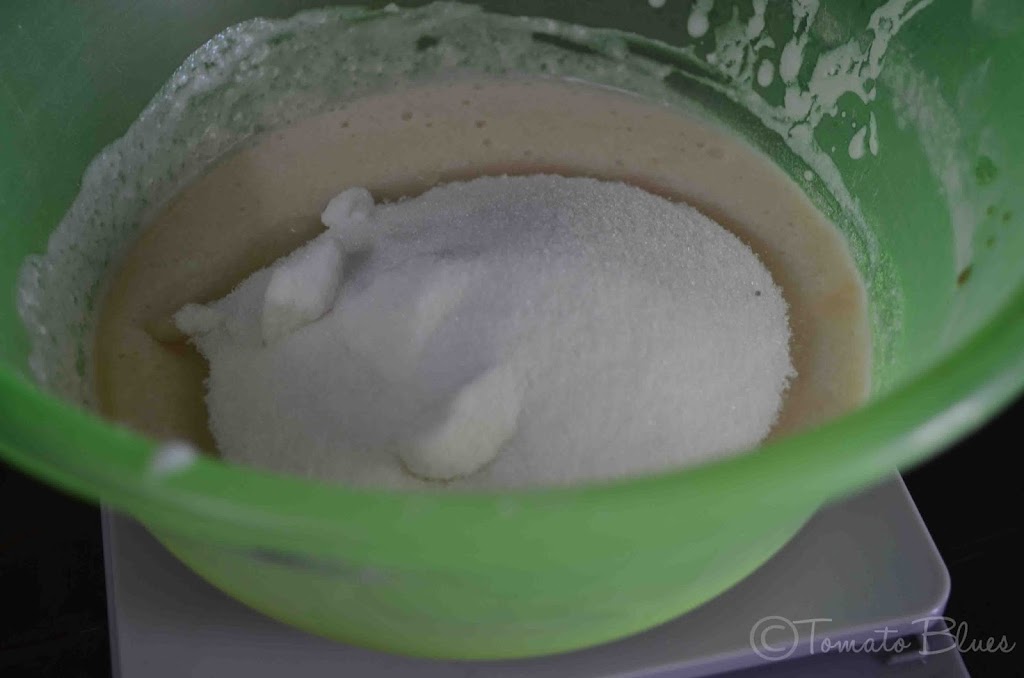
Remove 1/2 c of milk, bring it to a rolling boil and add saffron strands to it. Let it sit. Note: Dont reheat the badam milk after making it. The milk will curdle. |
Chama Dumpa Pulusu Recipe
Chama Dumpa Pulusu is an Andhra style gravy made with Taro root. This s a vegan, gluten-free tangy gravy that tastes delicious with hot rice.
I had not eaten taro root or colocasia in any other form other than its deep fried roast curry. Now the taro root roast is a family favorite and is often made as an accompaniment with slightly bland kuzhambu or sambar. I usually make it with mor kuzhambu. The tang in the Mor Kuzhambu and the heat and crunch in the pan roasted taro roots make a wonderful combination.
Little did i realise that there was more to this tuber than met the eye. I visited a friend a while back for a casual lunch. Nothing exotic. Just comfort food, some old songs and aimless banter. And she had made this delicious taro root pulusu. I was awestruck at its simplicity. And delighted that there was one more way in which taro root can be enjoyed.
This Chama Dumpa Pulusu is an authentic Andhra dish and does not call for any grinding. The tang from the tamarind and the sweet hints from the jaggery blend well to make your tongue sing for more. Its a feast on those days when you want a hot and spicy dinner with steamed rice and papads.
Chana Dumpa Pulusu
Equipment
- Pressure cooker
- Saute pan
Ingredients
- 10 small Taro root
- 3/4 c Tamarind extract from a gooseberry sized tamarind
- 5 peeled and chopped Shallots
- 1 tbsp finely chopped Garlic
- 1/4 c finely chopped Tomato
- 1 sprig Curry leaves
- 2 slit Green chilies
- 1 tsp Coriander powder
- 1.5 tsp Chili powder
- 1/2 tsp Turmeric
- 1 tbsp Jaggery
- 1 tsp Mustard seeds
- 1 tsp Fenugreek seeds
- 1/8 tsp Hing
- 1 tsp Salt or to taste
- 2 tbsp Oil
- 2 tbsp Chopped coriander leaves
Instructions
- Pressure cook the taro root for 2 whistles. Once done, peel and chop them into thin fingers.
- Heat a pan with oil and pop the mustard seeds.
- Add fenugreek, curry leaves and hing next.
- Now, toss in garlic and onions and fry till transparent.
- Add tomatoes next and fry till mushy.
- Now add all the spice powders and turmeric and mix well.
- Tip in the chopped taro root fingers and add the tamarind extract along with jaggery and salt.
- If you the consistency too thick, add some water to achieve your desired thickness.
- Mix well.
- Cook covered for 10 mins on a medium flame.
- Garnish with chopped coriander leaves.
- Serve hot with steamed rice and poppadoms by the side.
Notes
Use sesame oil for added flavors.
For Instant Pot & Air Fryer Recipes
Instant Pot timings may vary based on your geographic location. Air fryer settings and timings may vary based on the capacity and the model of the Air fryer.
Disclaimer
Nutrition values are provided here as a courtesy and are only a rough guide. Please consult a health care provider if you have any concerns.
Method :
Pressure cook the taro root for 2 whistles. Once done, peel and chop them into thin fingers.
Heat a pan with oil and pop the mustard seeds.
Add fenugreek, curry leaves and hing next.
Now, toss in garlic and onions and fry till transparent.
Add tomatoes next and fry till mushy.
Now add all the spice powders and turmeric and mix well.
Tip in the chopped taro root fingers and add the tamarind extract along with jaggery and salt.
If you the consistency too thick, add some water to achieve your desired thickness.
Mix well.
Cook covered for 10 mins on a medium flame.
Garnish with chopped coriander leaves.
Serve hot with steamed rice and poppadoms by the side.
Recipe Notes
Addition of garlic is optional. You may leave it out.
Use sesame oil for added flavors.
Coriander Diamond Cuts Recipe| Diwali Snack Recipes
HOW TO MAKE CORIANDER DIAMOND CUTS?
Diamond cuts were not a thing of my life until the year i started blogging. In our house, Diwali meant murukku, cheedai and mixture with an assortment of sweets that always included wheat halwa.
The year i began blogging was also the year of diamond cuts in the blogging circuit. Not being a diamond cuts person, i was not intrigued. But when diamond cuts continued to rein for 2 years after, i decided i must give it a shot.
Its one helluva beginner snack to try when you are just newly married and you have a husband to impress. But i wanted my version to be a little different than the regular diamond cuts.
When i came across this recipe in a cookbook that i have, i decided to give it a shot. And half the batch was gone by the time i finished making them. Thank god! i saved some for the pictures.
These coriander flavored diamond cuts are a twist to the classic diamond cuts recipe. The coriander, chilies and cumin create a flavor burst when you bite into the crunchiness. I plan to experiment with some other flavors the next time.
Maybe some fusion cooking- diamond cuts with basil or parsley?? For now, i m content munching on these diamond cuts and typing away the recipe.
Recipe for Coriander Diamond Cuts- Dhaniawale Namakpare
Coriander Diamond Cuts
Ingredients
- Maida 1 c
- Salt 3/4 tsp
- Cumin seeds 1 tsp
- Ghee 1.5 tbsp sub with shortening or vanaspati for vegan version
- Coriander leaves a small bunch picked and cleaned
- Green chilies 6
- Hing 1/4 tsp
- Water to knead
- Oil to deep fry
Instructions
- In a blender, place coriander, salt, hing and green chilies and blend to a paste adding about 1 tbsp water.
- In a mixing bowl, place maida and cumin and combine.
- Make a well in the middle of the flour and add ghee.
- Now add the coriander puree and combine well until the mixture resembles bread crumbs.
- Sprinkle water little by little and knead into a dough that s like chapathi dough.
- Make sure you dont add too much water or you wont get crunchy diamonds.
- Once done, divide the dough into 5 parts and shape each part into a ball.
- Heat oil for deep frying.
- Take a ball of dough and roll into a thin chapathi. Probably as thin as you can get.
- Make sure you have greased the rolling surface a wee bit before you do this.
- Once you have rolled the ball, using a pizza cutter, make cuts horizontally and vertically across the chapathi, leaving even spaces between the strips.
- I use a ruler and a pizza cutter to do this. You can also use a sharp knife.
- Once done, check if the oil is hot. To do this, put a small ball of dough into the oil. If it rises up immediately, we are done.
- At this stage, drop the small diamonds into the oil, a few at a time. Turn the flame to the lowest and fry for 2 to 3 mins until sizzling sound subsides.
- Drain from oil once the diamonds are a golden brown.
- Drain on a kitchen towel.
- Let cool completely.
- Store in an airtight container.
For Instant Pot & Air Fryer Recipes
Instant Pot timings may vary based on your geographic location. Air fryer settings and timings may vary based on the capacity and the model of the Air fryer.
Disclaimer
Nutrition values are provided here as a courtesy and are only a rough guide. Please consult a health care provider if you have any concerns.
Rasgulla Recipe Using Pressure Cooker| Easy Diwali Sweets Recipes
Before you begin making rasgullas, it is important to remember the technicalities involved. Never make rasgullas with buffalo milk or full cream milk. You will have rubbery balls and not rasgullas if you do. Its very important to knead chenna well. Curdle fresh milk and extract chenna. You must give enough space for the balls of chenna to double up in volume. Or you wont have spongy rasgullas. If you take care of all these things, primarily the milk, your work is pretty much done. The traditional bengali recipe doesnt call for addition of semolina. But i did add some to hold the dough together. Dont add more semolina than mentioned. Also, the pressure cooking time mentioned is crucial. Dont over cook or under cook them while in the pressure cooker. The sugar syrup may splatter on your kitchen walls or on your platform so stay at a safe distance while its cooking. It is very important to use a cooker large enough to accommodate all the rasgullas as they swell up in volume while cooking.
|
Recipe: Rasgulla Using Pressure Cooker
Prep Time:1 hour Cook Time: 10 mins plus 12 mins Yields 13 rasgullas Cuisine: Bengali Course:Dessert Allergy Info: Gluten And Nut Free
__________________________________________________________________________________
Vinegar 1/2 c diluted with 1/2 c water
Ice cubes 15 Semolina 1 tsp For The Sugar Syrup Sugar 3 cups Method Chenna: Bring the milk to rolling boil. Once it boils, let cool completely and remove the cream that forms on the top. We must remove the fat completely to get soft rasgullas. Sugar Syrup Combine sugar, water and cardamom in a deep bottomed pressure cooker or pan. Rasgullas Now, add the balls one by one gently into the sugar syrup. |
Gobi Musallam Recipe| Side Dish For Rotis
But you know how you get up and feel like doing something right away. That s how i felt the day i made Gobi Musallam. I woke up and it just felt like a Gobi Musallam day. And that sort of did it. I immediately set to work, making the gravy and cooking the cauliflower. We are cauliflower fanatics here. Plus its loaded with nutrients. This Gobi Musallam is something that will make a fine centerpiece on your table when you are hosting a dinner. But for the baking time, the efforts are actually minimal. I realised that when i had finished making the gravy in 15 mins flat. You can veganise it by subbing the cream with coconut cream. And you will have a beautiful deep red cauliflower on your table. I almost didnt have the heart to slice through.
|
Recipe: Gobi Musallam
Prep Time: 10 mins Cook Time: 40 mins Cuisine: North Indian Course: Side Dish Allergy Info: Gluten free, Soy Free, Egg Free, Can be Made Vegan
__________________________________________________________________________________
Ingredients
For The Gravy Onions 2 medium chopped finely Coriander leaves for garnish 2 tbsp chopped finely For The Cauliflower Cauliflower 1 large head leaves and stems discarded Directions Bring 5 to 6 cups water combined with salt and turmeric to boil in a large pan that can sit the cauliflower easily without the water spilling over. P.S Make sure you blanch the cauliflower well. |
Savory Bread Pudding Recipe| Breakfast Recipes
|
Recipe: Savory Bread Pudding
Prep Time: 10 mins Cook Time: 10 mins plus 30 mins Source: Adapted From Here
Cuisine: American Course: Breakfast Allergy Info: Nut free
__________________________________________________________________________________
Ingredients
Bread Slices 4 Onion 1 small chopped finely Tomatoes 2 med chopped finely Carrot 1 small peeled and grated Chili powder 1 tsp Garam Masala 1/8 tsp Coriander powder 1/2 tsp Coriander leaves 1 tbsp chopped finely Sour buttermilk 1 c Salt to taste Oil 1 tbsp Mustard seeds 1/2 tsp Butter or oil for greasing a deep baking dish Directions Preheat oven to 200 C. Once done, let cool for 10 mins.
Slice and serve hot or dig in as it is. Tastes best when eaten hot. |
Mushroom Cheese Sandwich Recipe| Sandwich Recipes
Carrot And Apple Smoothie Recipe| Smoothie Recipes
If its just me for breakfast at home, i always turn to a smoothie. Its easy, quick and filling all at the same time, guilt free. I sometimes make a smoothie to supplement a light breakfast. Its usually when i make a sandwich or some kanda batata poha. I made a sandwich a few days back and made this smoothie along with that. This is a milk free smoothie but its filling because of the fruit involved. It can be made ahead and chilled to be enjoyed as a drink any time of the day.
Recipe For Vegan Carrot Apple Smoothie
Carrot Apple Smoothie
Equipment
- Blender
Ingredients
- 1 c peeled and chopped apples
- 1 c peeled and chopped carrots
- 1/4 c chopped celery sticks
- 1 tsp Cinnamon powder
- 1 tsp Ground ginger
- 2 tsp lemon juice
- 1 tbsp honey or maple syrup
- 2/3 c water
Instructions
- Put apples, carrot and celery along with cinnamon powder, ground ginger and maple syrup or honey in a blender.
- Pulse this for a few times to break down the pieces.
- Now, add the water and blend to a smooth puree.
- Chill until ready to serve.
- This smoothie tends to separate while sitting in the fridge.
- Mix well before serving.
For Instant Pot & Air Fryer Recipes
Instant Pot timings may vary based on your geographic location. Air fryer settings and timings may vary based on the capacity and the model of the Air fryer.
Disclaimer
Nutrition values are provided here as a courtesy and are only a rough guide. Please consult a health care provider if you have any concerns.
Recipe Notes
You can also add a cucumber to this smoothie to make it more refreshing.
Other smoothies that you may want to try from here are
Strawberry smoothie
Cherry And Banana Smoothie
Calzones With Peas Filling Recipe| Yeast Bread Recipes
When Avant Garde Cookies chose novel Navratri as the theme for this month s first week, i considered many options. I thought of making some rice crispie bars that are very similar to our pori urundai. But finally, i settled on these calzones. Unlike the usual calzones, this has no sauce. But its got cheese. Yes, a calzone cant not have cheese.
The dough used for these calzones can be used to make a pizza or a stromboli too. It freezes well and can be made a day ahead. Plus it doesnt require all that resting that s usually involved in a pizza dough recipe. I chose my filling as a sundal. A sundal is nothing but beans or legumes stir fried. I made some changes to a basic sundal recipe and adapted it to suit this recipe. It worked very well, i must say. Give it a shot.
Recipe For Calzones with Peas Filling
( Calzones from the scratch with a peas filling)
Prep Time: 8 hours for soaking the peas
1 hour for the first rise of the dough
30 mins for the second rise
10 mins for the rest
Cook Time: 30 mins for the filling
30 mins for the calzones
Makes 4 medium size calzones
Allergy Info: Egg free
Ingredients
For The Calzone Dough:
All purpose flour 192 g (1.5 c)
Olive oil 2tbsp
Instant yeast 2 tsp
Sugar 1 tsp
Salt 1 tsp
Warm water 1/2 c
For The Filling:
Dried green peas 1.5 c
Any curry powder of your choice 1.5 tsp
Mustard seeds 1 tsp
Urad dal 1 tsp
Oil 1 tbsp
Salt a small pinch
Feta cheese 3 tbsp crumbled
Coriander leaves 2 tbsp chopped finely
Milk for brushing the dough 2 tbsp
Directions
Soak the peas overnight. The next day, pressure cook for 3 whistles adding 3 cups of water.
Once done, drain the water completely.
Heat a pan with oil.
Pop the mustard and add urad dal.
Once the dal browns, add the peas, curry powder and salt and cook for a minute.
Set aside.
Now, lets make the dough.
In a bowl, combine yeast, sugar and warm water.
Mix well.
Let sit until frothy.
In a big mixing bowl, add 1 c flour and salt and mix well.
Now make a well in the middle and add olive oil and yeast mixture.
Mix until everything just comes together.
You will have a shaggy mass of dough now.
Add the remaining flour and start kneading.
You may need more flour or less depending on the dough.
You must have a tacky smooth dough that s slightly sticky.
Once done, let it rise until double in volume.
Once double, punch the dough down.
Divide the dough into four pieces.
Take the filling and add the crumbled feta cheese and coriander leaves.
Mix well.
Take a piece of dough and shape into a ball.
Transfer to a slightly floured surface and roll into a 9″ circle.
Place 1/4th of the filling on one half of the circle.
Now, close the other half over the filling .
Bring together the edges and seal the calzone.
Repeat with the remaining pieces of dough.
Cover with a clean moist cloth and let rise until almost double in volume.
Towards the end of the second rise, preheat oven to 220 C.
Once the calzones are almost risen, brush with milk generously.
Bake in the oven for 30 mins or until golden brown.
Remove and let cool for 20 mins.
Once cool, tuck in.
P.S. I plan to use a tomato chutney as a sauce the next time i make this. In case you try it that way, let me know.
You can alternately make calzones with some pizza sauce and pizza toppings too.
Coriander & Spring Onion Thogayal Recipe| Dips And Spreads Recipes
The reason why this blog doesnt have many thugayal recipes is that i dont consider them photogenic. Bah! there i said it. I mean, i know its not a reason- not photogenic. But still, yes that s why i dont share thugayal recipes here. But i must overcome my thought. There s no such thing as not photogenic when it comes to food. Anything can be made appetizing in a photo with the right props and shooting in the right angle. This thugayal is a start in that aspect for me. Plus i love this thugayal for its flavors. Its an unusual combination of sorts but works beautifully once everything comes together. You can enjoy this with hot rice or some crispy dosas. Either way, it works like a charm.
Recipe For Coriander And Spring Onion Thugayal
(Dip made with coriander and spring onions)
Prep Time: 10 mins
Cook Time: 2 mins
Serves 2 generously
Allergy Info: Vegan
Ingredients
Coriander leaves 1 c chopped finely
Spring onions 2 stalks green and white parts chopped finely
Mint leaves 10
Urad dal 2 tbsp
Tamarind pulp 1 tsp
Dry red chilies 3 to 4
Green chilies 2 chopped finely
Oil 2 tsp
Salt to taste
To Temper:
Oil 1 tsp
Mustard seeds 1 tsp
Hing a small pinch
Curry leaves a sprig
Directions
In a pan, heat 1 tsp of oil and fry urad dal and dry red chilies till dal turns golden.
Set aside.
Heat 1 tsp of oil in the same pan and add spring onions and green chilies.
Fry till wilted slightly.
Now add coriander and mint leaves and fry till wilted.
Let cool.
Once cool, add the roasted urad dal, red chilies, mint, coriander, spring onions and green chilies to a blender.
Now, add salt and tamarind.
Grind to a coarse paste using little or no water.
Transfer to a clean dry bowl or container.
Heat a pan with 1 tsp.
Pop the mustard and add hing and curry leaves.
Add this to the ground paste.
Mix well.
Thugayal is ready to be served.
We had it with hot rice, ghee and some tomato raita.
You may also want to try my
Ridge gourd thugayal
Paruppu thugayal
Coriander coconut thugayal
Moong Dal Shorba Recipe| Easy Soup Recipes
Recipe For Moong Dal Shorba
( Lentils and veggies stewed into a thin soup. Serves as an appetiser.)
Prep Time: 10 mins
Cook Time: 30 mins
Serves 2
Allergy Info: Vegan
Indo Chinese Bell Pepper Sandwich Recipe| Sandwich Recipes
Lets talk some about today s sandwich. Now, if you all thought sandwiches are only synonymous to grilled cheese and pesto, i am about to change that thought. I dont follow recipes for a sandwich. Even salads too. I add what comes to my mind and strikes my fancy. And i have surprised myself each and every time. Because of the out come. This sandwich recipe is an indo chinese sandwich that i put together for lunch. The flavor burst simply took my tongue over. The soy and chili sauce lends a sharpness and heat to the sandwich but is balanced wonderfully by that cream cheese. The mint shines through all of this, making you crave for some more. Its not something one would normally come across in a sandwich stall but its something that you will love. As a snack box treat. As breakfast. As that tea time bite.
Recipe For Indo Chinese Bell Pepper Sandwich
( Sandwiches with bell peppers and indo chinese sandwich spread)
Prep Time: 10 mins
Cook Time: 10 mins
Serves 2
Ingredients
Sandwich bread slices 6 divided
Tomato 1 large sliced
Green bell pepper 1 small sliced
Butter 2 tbsp
For The Spread
Cream cheese 1/2 c softened
Mint leaves 10 shredded
Green chili sauce 1 tbsp ( I used Ching’s)
Soy sauce 1.5 tsp( I used Ching’s)
Oregano 1/2 tsp
Salt to taste
Directions
In a mixing bowl, combine all ingredients for the spread and mix well.
Apply 1 tbsp of spread on one slice of bread evenly.
Place a few slices of tomato and bell pepper.
Cover with one more slice.
Again apply the spread on the top slice.
Place bell pepper slices and tomato slices and place another slice over the slice.
Repeat with the remaining three slices of bread and spread.
Apply butter on both the sides of the sandwich and grill.
Alternatively, you can toast them on a griddle too.
Serve hot with ketchup.
This is sandwich 1 for our Palooza In A Pan this month. We are making sandwiches and some fun stuff with muffin tins. Stay tuned.
Godhuma Ladoo Recipe| Easy Navratri Recipes
I still remember the delicious ladoos that grandma used to roll out. Her version used to have little bits of coconut, some nuts and raisins. All flavored with a good amount of cardamom. My version of godhuma ladoo is only a paltry attempt to recreate that magic. For, no one in this whole wide universe can make godhuma ladoo like my grandma. I made a small batch a few days back as i was not sure how Mr.P would receive it. But he surprised me by finishing off the batch in two days. This ladoo keeps well for 3 to 4 days when kept outside. It makes a perfect treat to pack off for your little guests.
Recipe For Godhuma Ladoo
( Ladoos with whole wheat flour, jaggery and ghee)
Prep Time: 10 mins
Cook Time: 25 mins
Yields 12 ladoos
Ingredients
Whole wheat flour 1 c
Jaggery 1 c powdered
Water 3 tbsp
Cardamom powder 1 tsp
Cashews 3 tbsp broken
Raisins 2 tbsp
Ghee 1/4 c melted
Almond slivers for topping
Directions
In a pan, heat all of the ghee except 1 tbsp.
Add cashews and fry till golden.
Remove and set aside.
Add raisins next and fry till they fluff up. Drain and set aside.
Now, add the whole wheat flour to the pan.
Swiftly combine ghee and wheat flour until well incorporated.
Now, turn down the flame to a low medium.
Saute the wheat flour until golden brown and aromatic.
This takes 15 to 20 mins. Make sure the flame is always low and keep stirring continuously.
Keep stirring and dont move away from the pan or the wheat flour will burn quickly.
Once done, transfer the wheat flour to a pan.
Add cardamom, nuts and raisins to this wheat flour and mix well.
In the same pan, add jaggery and 3 tbsp of water.
Heat the jaggery until melted completely.
We are not making jaggery syrup here. We are only melting the jaggery.
Remove the jaggery immediately once it melts completely.
I get very good jaggery here. So i dint bother filtering the jaggery.
You may filter it if you are not sure about your jaggery quality.
Add the melted jaggery to the wheat flour.
Using a spoon, mix the jaggery and wheat mixture until it all comes together into a dough.
Dont panic if the mixture is a bit loose and shaggy.
It will harden as it cools down.
Once the mixture is warm enough to handle, apply ghee on your palms.
Take some mixture and shape into a ladoo.
Repeat for the entire mixture.
Place the ladoos on a parchment paper lined plate.
Gently place some almond slivers on the ladoos.
Let sit for 2 hours.
It will harden once cool completely.
Wheat ladoos are ready to pack for your guests.
Mixed Bean Sundal Recipe| Navrathri Recipes
As a kid, i ve seen my mom arrange her display of dolls and then the million dollar question will be posed by my dad. ” What s for prashad today?” my dad would innocently ask. And that would send my mom in frenzy. Finally she would decide on one sundal or a sweet treat. Sweet treats were usually made to order. Yes, my mom and i are so unlike when it comes to this one thing! Sundal, she would make. Yummy, protein rich sundals laden with coconut. People usually make sundal with one kind of beans. But i ve used many kinds in this sundal for a change. We get this mixed bean packets here and they come in handy when its Navratri.
Recipe For Mixed Bean Sundal
( Legumes stir fried and seasoned with coconut)
Prep Time: 6 hours soaking time
Cook Time: 20 mins
Serves 3 to 4 generously
Allergy Info: Vegan, Gluten free
Ingredients
Mixed beans ( I used garbanzo, chickpeas, white peas, green peas, black eyed beans, mung beans and cow peas) 1.5 c
Freshly grated coconut 1/2 c
Freshly grated ginger 1 tsp
Green chilies 10 to 12 minced finely
Curry leaves a sprig
Mustard seeds 1 tsp
Urad dal 1 tsp
Hing a small pinch
Oil 2 tbsp
Salt to taste
Directions
Soak the beans in 4 cups of water overnight or for 6 hours min.
The next day, they would have swollen and doubled in volume.
Pressure cook the beans with some salt and 3 cups of water for 2 to3 whistles until cooked but not mushy. Take care not to overcook the beans or the sundal wont have a nice appearance.
Once done, drain water completely from the cooked beans.
Heat a pan with oil.
Pop the mustard and add urad dal, green chilies, curry leaves and hing.
Once the dal browns, add the cooked beans and salt and mix well.
Now add grated coconut to this and mix well.
Remove from heat immediately.
Serve hot or warm. It goes well even as a side dish with rice and curry.
P.S. The amount of each bean is completely personal preference. Add how much ever you want of each kind. I get them readily mixed.
As this is served as an offering to Goddess, no onion is added. But you may add onion in case you make it on an ordinary day.
Beans usually cause flatulence. So dont skip the ginger.
Khaliat al Nahal Recipe| Yeast Bread Recipes
Now, coming back to Khaliat Nahal. For me, the name itself sounds exotic enough. It translates into bee hives in Arabic because the buns are baked in such a fashion. Small balls placed close to one another. They then swell up when they bake and when you pull the tin out, you have a beautiful honey comb looking bread. It s generally sweet. A sweet syrup is poured over the buns once they are baked. And the filling is cream cheese and assorted nuts. Aparna of our We Knead To Bake fame, set this recipe for this month and she gave us a savory option too. Because we are not very sweet toothed people, i made the savory version. They are little pillows of yum. That s all i can say.
Recipe For Khaliat al Nahal
( Recipe for Honey comb pattern buns with a savory filling)
Prep Time: 15 mins for the dough
1 hour for the first rise
45 mins for the second rise
Cook Time: 5 mins for the filling
20 to 25 mins for baking at 180 C
Source: Adapted slightly from here
Allergy Info: Egg free
Ingredients
Flour 1.5 cups
Garlic paste 1 tsp
Chili Garlic Noodles Recipe| Chinese Recipes
Recipe For Chili Garlic Noodles
( Noodles flavored with red chilies and garlic)
Prep Time: 10 mins
Cook Time: 15 mins
Serves 2
Ingredients
Vegetable Hakka Noodles 1 packet ( I used Ching s)
Onions 2 med sliced thinly
Garlic cloves 2 minced finely
Red chili sauce 1/2 tbsp
Dark soy sauce 1 tps
Schezwan fried rice masala 1 tsp ( I used Chings, 5 bucks for a sachet)
Sesame Oil 1 tbsp ( Feel free to use vegetable or olive oil)
Salt to taste
Directions
Cook noodles according to packet instructions. Remember all noodles are al dente. So cook them for a maximum of three mins and not more that.
Drain the water and wash the noodles under running water.
Now, wash the noodles with cold water and let the water completely drain.
Heat oil in a pan. I used sesame oil to give some enhanced taste but feel free to use any oil.
Add onions and garlic and fry till light brown.
Now add the schezwan fried rice masala and cook for 30 secs.
Add the sauces and mix well.
Add salt keeping in mind that the sauces already have some salt in them
Now, toss the noodles into this and turn the flame to the lowest.
Mix well until the mixture coats the noodles well.
Serve hot with ketchup. Tastes best when eaten hot.
Blueberry Plain Cake Recipe| Eggless Cake Recipes
I live in India. So i dont find fresh blueberries. I do get frozen ones and i found some the other day while meandering in the supermarket aisles. It was reasonably prized. So i picked one, came home, scoured for recipes and made this cake. There. I said it. I said it all. I made some slight variations to the original recipe but it was such a sell out, you wont believe it if i say it was gone in less than an hour of baking. Hot and all. Sigh!
Recipe For Blueberry Plain Cake
( Crumbly cake with blueberries)
Prep Time: 10 mins
Cook Time: 30 mins
Source: Adapted from here
Makes 2 small loaves
Allergy Info: Egg Free
Ingredients
Flour 3/4 c
Baking powder 1 tsp
Salt a small pinch
Sugar 3/4 c powdered
Milk 1/4 c
Yogurt 1/4 c thoroughly whisked
Vanilla 1/2 tsp
Unsalted soft butter 1/4 c melted
Fresh blueberries 1/2 c or frozen berries thawed 1/2 c
Directions
Preheat oven to 190 C for 10 mins.
In a mixing bowl, sieve all dry ingredients except sugar and combine well using a whisk.
Add the berries to this and mix well making sure the flour coats the berries fully.
In another bowl, place butter, vanilla, curd and milk and whisk thoroughly.
Add sugar to this and mix again until well incorporated.
Grease 2 mini loaf pans or one 6″ round cake tin with some butter.
Pour the mixture half way till the pans. In case you are using loaf pans, divide the batter between the both making sure the pan is only half full.
Tap pan gently on the counter.
Bake for 25 to 30 mins or until a skewer inserted comes out clean.
Cherry Tomato Frittata Recipe| Breakfast Recipes
Recipe For Cherry Tomato Frittata
( Frittata with roasted cherry tomatoes and veggies)
Prep Time: 10 mins
Cook Time: 40 mins
Serves 1
Allergy Info: Nut free
Ingredients
Eggs 3 medium
Bell pepper 1 small chopped finely
Roasted cherry tomatoes 1/4 c
Milk 1/4 c
Parmesan cheese 2 tbsp grated
Pepper 1/2 tsp
Salt to taste
Coriander leaves 2 tbsp chopped finely
Oil 1 tsp
Directions
Preheat oven to 180 C.
Grease a deep baking dish with oil.
In a bowl, add eggs, milk, cheese, pepper and salt and whisk till frothy and light. Add coriander and mix well.
Place bell peppers and tomatoes in the baking dish and spread evenly.
Now pour the egg mixture over the bell peppers and tomatoes.
Bake in the oven till completely cooked and brown on the top.
Serve hot or warm with some toast.
Capsicum Lemon Rice Recipe| Easy Rice Recipes
Now, i have a different way of making lemon rice. In fact more than one way. I experiment often with a single recipe, changing an ingredient here and there or adding something and removing something. This version of my lemon rice is something that i learnt from my landlady in Bangalore. This was probably the only breakfast that i ate and as well as packed for my lunch. I m sure you all have a version too. But give mine a shot if you feel bored of your version sometime or if you have a kid that screws up his nose too often.
Recipe For Capsicum Lemon Rice
( Rice cooked with capsicum and nuts and flavored with lemon)
Prep Time: 10 mins
Cook Time: 10 mins
Serves 2
Allergy Info: Vegan
Ingredients
Cooked rice 2 c
Onion 1 large chopped finely
Capsicum 1 large chopped finely
Green chilies 10 to 12 slit lengthwise
Peanuts a handful
Curry leaves a sprig
Turmeric powder 1/2 tsp
Hing a small pinch
Lemon juice from 1 lemon
Salt to taste
Oil 2 tbsp
Mustard seeds 1 tsp
Urad dal 1 tsp
Chana dal 1 tsp
Coriander leaves 2 tbsp chopped finely
Directions
In a pan, heat oil and pop the mustard.
Now, add urad dal, chana dal, peanuts, curry leaves, hing, turmeric powder and saute till dals turn a golden brown.
Add the onions and capsicum next and saute till onions turn a golden brown.
Now add cooked rice and salt and mix well.
Switch off the flame and add lemon juice.
Mix again.
Garnish with coriander leaves and mix well.
Serve hot with any curry of your choice.
Roasted Cherry Tomato Pesto Recipe| Pesto Recipes
Recipe For Roasted Cherry Tomato Pesto
( Pesto with cherry tomatoes roasted in the oven)
Prep Time: 10 mins
Cook Time: 30 mins
Yields 1/2 cup
Ingredients
Cherry tomatoes 1 c
Almonds 1/4 c
Chives 1 stalk chopped finely
Garlic 3 cloves
Parmesan cheese 1 tbsp grated
Mixed dry herbs 1 tsp
Pepper powder 1/2 tsp
Salt to taste
Oil 2 tbsp
Directions
Preheat oven to 180 c.
Line a baking tray with foil.
In a bowl, toss together tomatoes, herbs, salt and pepper.
Spread them evenly on the lined tray and bake for 30 mins until tomatoes wilt and the skin shrivels.
Cool completely.
In a blender, combine tomatoes, almonds, cheese, garlic and chives and blend to a smooth paste. You wont require any water as the water in the tomatoes will help in the grinding. Just stop the blender once in between and give it a mix and then blend again.
Transfer to a clean air tight container and store in the fridge.
Use as a pasta sauce or as a spread on sandwiches or parathas.
Sweet Ragi Puttu
Recipe For Sweet Ragi Puttu
( steamed finger millet flour flavored with coconut and cardamom)
Prep Time: 10 mins
Cook Time: 15 mins
Serves 2
Allergy Info: Can be made vegan, gluten free
Ingredients
Ragi flour (finger millet flour) 1.5 c
Water as required
Jaggery 3/4 c powdered finally
Freshly grated coconut 1/2 c
Cardamom 1 pod crushed
Clarified butter (ghee) 1 tbsp (optional)
Directions
In a mixing bowl, place the ragi flour.
Sprinkle water by the tablespoon and mix the flour into a crumbly mass. Dont add too much water. The mixture should not bind or come together in one mass. It must resemble something like bread crumbs.
Transfer this on to idly plates or your steamer and steam for 15 mins.
Once done, remove from heat and place in the bowl.
Add the powdered jaggery, coconut and cardamom to this and mix well.
Add 1 tbsp ghee and mix again.
Serve hot with some more ghee or as it is.
Yummy and healthy breakfast done.
We are beginning our second year s journey of Avant Garde Cookies group this month. Our theme for this week is traditional rural foods. And this ragi puttu is my contribution to the theme.
Black Eyed Bean Burger Recipe| Burger Recipes
Now, i ve been wanting to recreate that burger experience at home , like forever, now. And the last month, Groovy Gourmets decided the September theme as burgers without the humdrum aloo patties. So, i grabbed the opportunity and made these burgers with black eyed beans patties. I did not bake the buns as i dint have the time to. But i do have a spectacular recipe here for burger buns. So, go ahead and bake them if you got the time. A burger with home baked buns has its own charm. We are not great fans of fries at home. So i just served my burger with some potato wafers.
Recipe For Black Eyed Bean Burger
( Burgers with black eyed bean patties)
Prep Time: Overnight for soaking the beans
10 mins for the rest
Cook Time: 1 hour
Yields 3 to 4 burgers
Ingredients
For The Pattice
Black eyed beans 3/4 c soaked overnight
Potato 1 medium peeled and boiled.
Bread slices 3
Ginger garlic paste 1 tsp
Cumin powder 1/2 tsp
Chili powder 1 tsp
Garam masala 3/4 tsp
Coriander powder 1/2 tsp
Corn flour 2 tbsp
Coriander leaves 3 tbsp chopped finely
Salt to taste
Flour 1/4 c
Water 3/4 c
Bread crumbs for rolling
Oil to shallow fry
For The Spread
Cream cheese 3 tbsp
Thousand island spread 2 tbsp (optional)
Mixed herbs 1 tsp
For The Assembly
Tomato slices 6 to 8
Cucumber slices 8
Directions
Pressure cook black eyed beans and potato until mushy.
Drain water completely.
Place beans, potato, coriander leaves, corn flour and all spice powders with salt in a mixing bowl.
Dunk the bread slices in a bowl of water, squeeze all the water out and add to the bowl.
Now, knead into a dough sort of mixture until all ingredients are combined well.
Check for seasoning and adjust.
Divide the patty mixture into 4 equal parts and shape each part into a round patty that s 1/2″ thick.
Heat a pan with some oil for shallow frying.
In a bowl, combine flour and water into a mixture.
Dunk a patty into the flour mixture and make sure its coated well.
Now roll the patty into the breadcrumbs making sure its evenly coated.
Drop the patty into the pan and fry till golden brown.
Repeat with the remaining patties.
Lets assemble the burger now.
In a bowl, combine together cream cheese, herbs and thousand island dressing ( if using).
Take a bun and slit into half horizontally.
Spread the cheese mixture on the bun halves.
Place a patty on one half of the burger.
Place tomato slices and cucumber slices on the patty.
Drop another 1/2 tbsp of spread on the cucumber slices.
Now cover with the remaining half.
Repeat for the remaining burger buns and patties.
Serve warm or hot with potato fries and any drink of your choice.
Vegan Zucchini Brownies Recipe
Recipe For Vegan Zucchini Brownies
( Learn how to make Vegan Zucchini Brownies, a guilt free brownie recipe with no oil, no butter and no eggs)
Prep Time: 10 mins
Cook Time: 30 mins
Yields 16 2″ squares
Allergy Info: Vegan
Ingredients
Whole wheat flour 1/2 c (64g)
All purpose flour 1/2c (64g)
Cocoa powder 1/4 c
Baking soda 3/4 tsp
Cocoa chips 1/2 c
Caster sugar 3/4 c ( you may need more if your bananas are not sweet)
Banana puree 1/2 c
Finely grated zucchini 1 c
Vanilla extract 1/2 tbsp
Directions
Preheat oven to 175 C (350 F) for 10 mins
In a mixing bowl, combine all the dry ingredients except sugar and combine thoroughly making sure that the flour coats the chocolate chips evenly.
In another bowl, place sugar, zucchini, banana puree and vanilla extract and mix well. You will notice that the zucchini turns the sugar liquid once they both are combined.
Add the dry ingredients to this wet mixture and whisk well. Dont worry about the brownie becoming too dense.
Grease an 8″x 8″ cake pan with some oil and line with parchment paper.
Pour the brownie batter into the pan and spread evenly with a spatula.
Drop the pan gently on the counter once to get rid of any air bubbles.
Bake in the preheated oven for 25 mins to 30 mins until a skewer inserted comes out clean.
Mine took 30 mins to get done but keep an eye from the 25th min onwards.
Once done, remove and let cool completely or for atleast an hour before you slice them into bars.
Keeps well for a week when refrigerated.
Badushah Recipe| Festival Sweet Recipes
Azhagar Kovil Dosai Recipe| Dosa Recipes
That s when i chanced upon this Azhagar Kovil dosa. It was love at first sight because it had my favorite spice- black pepper. And husked urad dal. And ginger. And curry leaves. More and more reasons for me to love. And it was a super hit with Mr.P too. I mean, all dosas are a super hit with him but he really relished his Azhagar Kovil dosa. Which makes me one super happy girl!
Recipe For Azhagar Kovil Dosa
( Crepes with rice, lentils and spices)
Prep Time: Overnight soaking time
20 mins for grinding
4 hours to ferment
Cook Time: 2 to 3 mins for dosa
Allergy Info: Vegan, Nut Free
Yields 12 dosas.
Ingredients
Par boiled rice 1 c
Husked whole black gram dal (karuppu ulundhu) 1/2 c
Ginger 1″
Pepper corns 1 tbsp
Cumin seeds 1 tsp
Curry leaves a sprig
Salt to taste
Oil to cook the dosa
Directions
Soak rice and dal separately overnight.
The next day, wash thoroughly the rice and dal.
I dint clean the husk in the dal completely.
In a blender, place dal, ginger, peppercorns, cumin and curry leaves and grind to a smooth fluffy paste. Make sure you rest your blender in between.
Remove and transfer to a bowl.
Grind rice to a slightly coarse paste in the blender. Again rest your blender in between and add water as required. I added about 1/3 c of water.
Now, mix both the rice and dal batter together, add salt and let sit for 4 to 5 hours.
This is to ferment the batter. And it will take longer or shorter depending on the weather in your location.
Once the batter has fermented, heat a tawa.
Pour a ladle of batter on the tawa and spread it into a circle that s slightly thicker than the regular dosa.
Drizzle oil along the sides.
Cook till no raw batter is seen on the top.
Flip again and cook for 45 secs more.
Remove from flame.
Repeat with remaining batter.
Serve hot with any chutney of your choice.
Pudalangai Varuval Recipe| Snake Gourd Fry| South Indian Lunch Recipes
Prep Time: 20 mins
Cook Time: 20 mins
Serves 2
Allergy Info: Vegan
Ingredients
Snake gourd 1 large cut into juliennes
Curry leaves a sprig
Salt to taste
For The Batter
Gram flour (besan/kadala maavu) 3 tbsp
Rice flour 1 tbsp
Corn flour 1 tbsp
Chili powder 1 tsp
Hing a small pinch
Salt to taste
Water 2 tbsp
Oil for frying
Directions
Sprinkle a little salt on the cut gourd pieces and let rest for 5 mins. After that, squeeze out as much water as you can from the gourd. In a mixing bowl, combine all the ingredients for the batter except water using a whisk.
Now add the snake gourd into this and combine well in such a way that the flour mixture coats the gourd well.
Sprinkle about 1 tbsp of water on the mixture and mix. You should not have a runny mixture. What we need is that the flour coats the gourd. You will have a crumbly mass at the end. In case you find the mixture too dry, add the remaining 1 tbsp water and mix well.
Check for seasoning and adjust if required.
Heat oil in a pan.
Deep fry the gourd pieces in batches till golden brown.
Drain on a kitchen towel.
In the end, fry the curry leaves and mix with the gourd.
Serve hot with spinach garlic dal and tomato rasam
Instant Ragi Dosa Recipe| Finger Millet Dosa
HOW TO MAKE INSTANT RAGI DOSA?
Instant Ragi Dosa is a quick Dosa made with finger millet flour.
My mother grew up eating a lot of Ragi. It s traditional to eat ragi mudde and piping hot avarekaalu saaru in Karnataka. And my mom had this fortune. But when they migrated to Tamil Nadu, the tradition was lost. Even to this day, my mom fondly recollects those days when she used to eat ragi mudde drizzled with ghee generously. And she insists on adding pearl millet and other millet to our everyday diet once in a while. Millets are a fabulous option for people who are diabetic or allergic to gluten.
Like most Instant dosa recipes, these Instant Ragi Dosas need some gluten to hold them together. I have used all purpose flour in this recipe. But you can use whole wheat flour in its place too.
These Instant millet dosas are a brilliant way to incorporate millet into our diets. Millet, apart from being rich in iron are also good in terms of fiber and B complex vitamins. For those of you who are not health freaks, this dosa is an easy to put together breakfast option and can be had as it is.
Instant Ragi Dosa
Ingredients
- Finger millet flour 1 c
- All purpose flour 1/2 c
- Rice flour 1/2 c
- Sour butter milk 4 to 5 c
- Green chilies 10 to 12 chopped finely
- Coriander leaves 1/4 c chopped finely
- Salt to taste
- To Temper
- Oil 1 tbsp
- Mustard seeds 1 tsp
- Cumin seeds 1 tsp
- Hing 1/4 tsp
- Oil for cooking the dosas
Instructions
- In a mixing bowl, combine all the flours and whisk thoroughly.
- Add butter milk to the mixture and mix well until there are no lumps in the mixture.
- Your batter must be runny. It must flow freely when you lift and pour a ladle. Depending on the consistency, you may need more or less of the quantity of the buttermilk mentioned.
- Add salt, green chilies and coriander leaves and mix well.
- Rest the batter for 20 mins.
- After that, heat a pan with oil.
- Pop the mustard seeds and crackle the cumin seeds.Now add hing and transfer this to the batter.
- Heat a tawa.
- Now, pour a ladle of the batter starting from the outer edge and go on to fill the center.
- Drizzle oil around the edges of the dosa.
- Cook on low flame until the sides crisp up.
- Flip over and cook the other side too.
- Serve hot with roasted garlic coconut chutney
Notes
Cook the dosa on low flame as it tends to burn easily and quickly.
For Instant Pot & Air Fryer Recipes
Instant Pot timings may vary based on your geographic location. Air fryer settings and timings may vary based on the capacity and the model of the Air fryer.
Disclaimer
Nutrition values are provided here as a courtesy and are only a rough guide. Please consult a health care provider if you have any concerns.
Rose Yogurt Panna Cotta Recipe| Dessert Recipes
I have a fetish for desserts. And desserts that are not loaded with butter or clarified butter sings to me, ” Come on, baby! ” all the time. What i love about desserts in a jar is that they are controlled portions and totally mess free. Now, coming to Panna Cotta. The Italians sure do know their desserts. When it comes to picking one dessert, it will be panna cotta for me. I came across yogurt panna cotta a while back while i was scouring for panna cotta recipes. I was tempted to make it even way back then but cardamom and mango were almost having affairs with me. So, i let the thought be, only to make it happen with this month s challenge to whip up something delish and relish in a jar. I was simply amazed at how simple ingredients like cream, milk, sugar and yogurt can give one a high. Need i say more?
Recipe For Rose Yogurt Panna Cotta
( Panna cotta made with yogurt)
Prep Time: 10 mins
Cook Time: 15 mins
Setting Time: 8 hours or overnight in the fridge
Serves 2 very generously
Allergy Info: Gluten free, Grain free
Ingredients
Thick fresh yogurt 200 g
Milk 1/2 c
Cream 2 tbsp
Sugar 1/4 c
Dried rose petals 2 tbsp (the edible kind)
Rose water 1 tbsp
Rose extract 1 tsp
Gelatin 2 tsp
Cold water 1 tbsp
Directions
In a small bowl, bloom the gelatin by mixing with 1 tbsp cold water and resting for 10 mins. The gelatin would have become jelly like after 10 mins.
In a pan, combine sugar, cream and milk and heat until it comes to a rolling boil. Switch off flame and let cool completely.
Whisk the yogurt well making sure there are no lumps.
Add rose water and rose extract to the yogurt and mix.
Once the milk mixture is cool, add the dried rose petals.
Take about 2 tbsp of the milk mixture and add to the gelatin. Mix thoroughly, stirring with a whisk.
Add this to the yogurt and mix well.
Now, add the milk mixture to the yogurt. You have to be careful here. Do not add the yogurt to the milk mixture.
Pour into jars and let set overnight.
Serve cold as is or topped with any fruit gelee of your choice.
Now here s what others whipped up for this month s Recipe Redux. Please note that this linky tool is only for Recipe Redux members and all other Non Recipe Redux member link ups shall be deleted.
Mini Meal | Lunch Thali Ideas
![]() |
| Starting from top left, Kalkandu Sadam, Carrot Rice, Capsicum Lemon Rice, Coconut Rice, Curd Rice And Chili Idli. Raita In The Middle |
Like i mentioned before, our Cookies group is celebrating the anniversary this month. While we all made cakes and cookies for week 1 and week 2 respectively, we did the bravo thing for week 3. Yes, you guessed right. We all decided to put together a thali meal for week 3. I m proud to say that this thali is my first on the blog and surprisingly, i enjoyed putting it together very much. Because we are only two poor souls living under this roof, i decided to keep it simple and make a mini meal. Now, if you ask me what a mini meal is, i d say it is for the fast and the frantic. People who want to eat on the go. People who dont have the time to sit down to eat a proper lunch and yet they wouldnt want to eat granola bars for lunch. Its for those kinds. I usually make the regular sambar, curry and rasam platter for lunch. That s why i picked this mini meal idea. Something that i can eat and Mr.P can enjoy too. While the menu may look extensive and time consuming, its truly not. I made all of it in an hour flat. Its just that it requires some kind of organised cooking. But it really is a treat to indulge in. Either a relaxed lunch or a Sunday brunch, this mini meal works wonders.
Mini Meals- A Lunch Thali Idea
( A platter of flavored rice and one starter)
Prep Time: 20 mins
Cook Time: 30 mins
Makes 1 mini meal
What It Has?
Carrot rice1 serving Recipe Here
Curd rice1 serving Recipe Here
Kalkandu Sadam 1 serving
Capsicum lemon rice 1 serving
Coconut Rice 1 serving
Chili idli 1 serving Recipe Here
Onion Raita 1 serving
I have posted the recipes for carrot rice, curd rice and chili idli. I shall post the recipe for kalkandu sadam, capsicum lemon rice and coconut rice in the coming weeks.
Chili Idli Recipe| Leftover Ideas
I made it for a lunch thali that i served. And Mr. P dint even realise that its idli. Lets recall for the millionth time that Mr.P religiously hates idlies. It tasted delicious with some onion raita and it even complemented the other dishes in the thali.
Recipe For Chili Idli
( Rice and lentil cakes stir fried the chinese way)
Prep Time: 10 mins
Cook Time: 20 mins
Serves 2 generously
Allergy Info: Vegan
Ingredients
Idlies 4 to 5 cut into 8 pieces each
Onion 1 large chopped finely
Tomato 1 large chopped finely
Green bell pepper 1 medium chopped finely
Spring onions 1 stalk chopped finely ( both white and green)
Ginger garlic paste 1 tsp
Soy sauce 1 tbsp
Chili sauce (red or green, both work well) 2 tbsp
Fennel seeds 1 tsp
Coriander powder 1/2 tsp
Oil 1/2 c
Salt to taste
For Garnish
Spring onion greens 1 tbsp
Onion rings a few
A lemon wedge
Directions
Heat 1/2 c oil in a pan.
Fry the idli pieces till golden. Drain on a kitchen towel and set aside.
Remove all of the oil from the pan except for maybe a tbsp.
Add the fennel seeds and once they crackle, add the onions and spring onions now..
Fry the onions till transparent and add the capsicum.
Saute for 30 secs.
Now, add the ginger garlic paste and saute for another 30 secs.
Follow with coriander powder and cook for 30 secs.
Now, add the tomatoes and mix well. Cook till oil separates from the mixture.
Add the sauces and mix well.
Add the fried idlies and salt.
Mix well.
Cook further for a min.
Garnish with chopped spring onion greens.
Serve hot with a lemon wedge and onion rings. We enjoyed it with some onion raita on the side.
Quick Tomato Dosa Recipe| Dosa Recipes
![]() |
| Tomato Dosa, Idli Podi And Cantaloup Juice- A hearty breakfast |
Recipe For Quick Tomato Dosa
( Tomato flavored lentil crepes)
Prep Time: 10 mins
Cook Time: 2 mins for a dosa
Yields about 6 dosas
Allergy Info: Vegan, Gluten free
Ingredients
Dosa batter 2 cups
Coriander leaves 1/4 c chopped finely
Cumin seeds 1.5 tsp
Grated ginger 1 tbsp
To Grind
Tomatoes 3 largish ripe ones
Green chilies 4 to 5
Garlic 2 cloves
Salt to taste
Directions
In a blender, blend together tomatoes, green chilies, salt and garlic to a fine paste. Avoid adding any water as this will make the batter very runny.
Now, add this paste to the batter.
Add coriander leaves, cumin seeds and grated ginger to the batter and mix well.
Heat a tawa.
Pour 1/3 c of the batter onto the tawa and spread into a thin circle all over the tawa.
Drizzle oil around the edges.
Cook till the upper side is done. Now flip over drizzle oil and cook for a min more.
Serve hot as it is or with some yogurt and idli podi.
This is dosa 2 in the palooza. I previously posted Spring Roll Dosa which is dosa 1. Do check out radhika and roshni for their delicious dosas.
P.S My dosa is not slightly reddish because i used orangish tomatoes. I only had them on hand. If you use ripe red dosas, you will have reddish dosas.
Fruit And Nut Salad Recipe| Salad Recipes| Dessert Recipes
Recipe For Fruit And Nut Salad
( Fruits and nuts in a hot and sweet dressing)
Prep Time: 10 mins
Cook Time: Nil
Serves 2 generously
Allergy Info: Gluten Free
Ingredients
Apple 1 small cored and cubed
Banana 1 sliced thinly
Sapodilla 1 peeled and cubed
Pomegranate pearls 1/2 cup
Plum 2 pitted and chopped
Orange 1 small segmented and seeds removed*
Dates 7 pitted and chopped into pieces
Raisins 2 tbsp
Roasted nuts a handful ( I used a combo of almonds, pistachio and walnuts)
For The Dressing
Honey 3 tbsp
Lemon juice 1 tsp
White pepper powder 1/2 tsp
Directions
In a mixing bowl, combine honey, lemon juice and pepper and mix well till emulsified.
Add the fruits and nuts and toss well.
Refrigerate for an hour.
Serve cold as it is or with some ice cream.
* I dint have an orange on hand when i made this salad last time. But i ve tried using orange in this and it gives a real kick.
You can omit the plums if you want.
Addition of a few berries would also be a good idea.
Use molasses for a vegan version.
Spring Roll Dosa Recipe| Dosa Recipes
Recipe For Spring Roll Dosa
( Lentil Crepes Filled With Spring Roll Stuffing)
Prep Time: 10 mins
Cook Time: 2 mins for each dosa
Makes 6 dosas
Allergy Info: Vegan
Ingredients
Dosa Batter 3 c( refer notes)
Vegetable Hakka Noodles 1.5 c
Onion Tomato Chutney 1/2 c
Spring onions 4 tbsp chopped finely
Oil 3 tbsp
For Serving
Chettinad Tomato Chutney
Roasted Garlic Coconut Chutney
Sambar ( recipe soon!)
Directions
Heat a tawa.
Pour 1/2 c of dosa batter on the tawa and spread into a thin circle starting from the center and going to the edges.
Drizzle about 1/4 tbsp oil on the sides.
Once you see no raw batter on the dosa and the sides have crisped up, flip and cook for 45 secs. Drizzle another 1/4 tbsp of oil.
Once done, flip over. Reduce the flame to the lowest.
Smear about 1 tbsp of chutney evenly on the dosa.
Sprinkle some spring onion on the dosa.
Place about 1/4 c of noodles on end of the dosa.
Now roll up the dosa.
Remove from heat and cut into three pieces with a sharp edged spatula.
Serve immediately with chutneys and sambar.
P.S This dosa tastes good only when served immediately.
You can make the noodles and chutneys ahead.
For making dosa batter, click on the link mentioned in the ingredient list.
Coconut Cardamom Cookie Recipe| Eggless Cookies
Recipe For Coconut Cardamom Cookies
( Egg less cookies with coconut and cardamom flavors)
Prep Time: 10 mins
Cook Time: 15 mins
Yields 15 cookies
Allergy Info: Nut free, Egg free
Source: Loosely adapted from here
Ingredients
Flour 64 g (1/2 c)
Unsalted Soft Butter 50 g (3 tbsp+ 1 tsp)
Caster sugar 60 g
Dessicated coconut 50 g
Cold milk 1 tbsp
Cardamom powder 1 tsp
Vanilla extract 1/2 tsp
Baking powder 1/2 tsp
Salt a pinch
Pistachios 15 shelled for topping
Directions
Preheat your oven to 180 C.
In a mixing bowl, cream together sugar and butter until fluffy.
Add vanilla to this and whisk again.
Now add cardamom powder, milk,coconut and flour. Mix well until the dough just comes together.
If you find the dough crumbly, add some more milk but not more than 1/2 tbsp.
Grease a baking tray with parchment paper.
Now, scoop portions out of the dough using a cookie scoop or a tablespoon.
Shape into balls.
Place on baking tray.
Gently press a pistachio each on a cookie dough ball.
Bake for 15 mins or till tops turn golden.
Let cool completely before removing from the baking tray.
Serve with hot tea or cold milk.
Vegetable Hakka Noodles Recipe| Indo Chinese Recipes
But making hakka noodles at home proved quite a challenge to me for a while. You see, the drama of making hakka noodles in my house usually unfolds in this way- i spot a packet of noodles at my grocers’ and almost do a war dance ( Mr.P raises two eyebrows in disgust, of course!) I come home, chop all the veggies. Bring a really really large pot of water to boil. ( apparently to cook the noodles in). And then when the water starts boiling, i dunk the noodles in. Now begins the theatrical. Somehow, almost no noodle company has ever managed to convince me that three or four minutes is enough to cook a bundle of noodles. So, i begin testing the noodles, dunking my slotted spoon in and out. In and out. In and out. And so it goes on. And finally when i m actually convinced, ( i become convinced only when i lift a noodle out and it seems translucent to me. Dont ask why but that s the way it is or rather was, until recently), i switch off the stove.
Drain the water, rinse the noodles under cold water only to find that they have all turned to a mush. Of course, i overcooked it. Now, this has happened not once, not twice but more than ten times in my kitchen.
But folks, i did not lose heart. This time, i was determined to switch off the stove the third minute. Okay, i cheated a bit and switched it off the fourth minute, immediately washed it under cold water and smeared oil into them after spreading them on a plate. And my my, i really stood back and admired the fine noodle work that i had done. What beautiful non sticky perfectly cooked noodles i had in front of me. I almost whistled and set to work with my hakka noodles. So here s my recipe!
Recipe For Vegetable Hakka Noodles
( Chinese noodles cooked with veggies and sauces)
Prep Time: 20 mins
Cook Time: 20 mins
Serves 2 generously
Ingredients
Chinese noodles 200 g
Onion 2 med half moon sliced thinly
Carrot 1 med peeled and julienned
Beans 15 med ones chopped into bite size pieces
Cabbage 1/2 c chopped finely
Capsicum 2 med chopped finely
Spring onions 2 stalks chopped finely
White pepper 1.5 tsp
Red chili sauce 1 tbsp
Green chili sauce 2 tbsp
Soy sauce 1 tbsp
Tomato ketchup 2 tbsp
Salt to taste
Oil 2 to 3 tbsp
Directions
Cook noodles according to package instructions. Please follow package instructions. Learn from my aforementioned mushy noodle experience. Once done, rinse under cold water, spread on a plate.Drizzle some oil over it and mix well. Set aside.
Bring a pot of water to a rolling boil.
Now drop the carrots and beans in and let sit for 3 mins.
After 3 mins, drain water completely and immediately dunk into ice cold water. This will help retain color and crunch.
Heat a pan with oil.
Add the onions and fry till transparent.
Follow with all the veggies except the spring onions.
Saute for 1 min.
Now, add all the sauces, pepper and salt and mix well. Go easy on the salt as all the sauces have some in them.
Now, add the cooked noodles and combine well.
Cook on the lowest flame possible for 2 to 3 mins to make sure all the flavors get incorporated well.
Now, add the spring onions and mix well.
Serve hot with ketchup or mixed vegetable manchurian
Stay tuned for one more exciting recipe featuring noodles!
Roasted Garlic Coconut Chutney Recipe| Side Dish For Idli& Dosa
Recipe For Roasted Garlic Coconut Chutney
( Chutney with fresh grated coconut and garlic)
Prep Time: 10 mins
Cook Time: 2 mins
Serves 2 to 3
Allergy Info: Vegan, Nut free
Ingredients
Freshly grated coconut 1/2 c
Fried gram dal (pottukadalai/chutney paruppu) 2 tbsp
Garlic cloves 4 to 5
Dry red chilies 2
Tamarind pulp 2 tsp
Oil 1 tsp
Salt to taste
For Tempering
Oil 1 tsp
Mustard seeds 1 tsp
Curry leaves a sprig
Directions
Heat a pan with 1 tsp oil.
Slightly crush the garlic cloves.
Add the dry red chilies and garlic to the oil and roast them until light brown. Let cool a bit.
In a blender, place the coconut, chutney dal, roasted garlic, tamarind and dry red chilies along with salt.
Add about 2 tbsp water and grind to a smooth paste.
Add more water if you find the chutney too thick.
Heat a pan with a tsp of oil.
Pop the mustard seeds and add the curry leaves.
Now add this to the ground paste.
Voila! your chutney is done.
Carrot Rice Recipe| Rice Recipes
Recipe For Carrot Rice
( One pot meal with carrots and rice)
Prep Time: 10 mins
Cook Time: 30 mins
Serves 2 heartily
Allergy Info: Vegan, Gluten free
Ingredients
Cooked rice 2 cups
Carrots 2 medium peeled and grated
Onion 1 large chopped finely
Ginger garlic paste 1 tsp
Garam masala 1/2 tsp
Chili powder 3/4 tsp
Cinnamon 1/2″
Cloves 2
Cardamom 1
Fennel 1/4 tsp
Cumin seeds 1/4 tsp
Oil 1 tbsp
Cashews 2 tbsp broken
Salt to taste
For Garnish
Coriander leaves 2 tbsp chopped finely
Directions
Heat a pan with oil.
Crackle the cumin seeds and throw in the fennel, cloves. cinnamon and cardamom and fry till a light brown.
Now add the cashews and onions and saute till the onions turn a light brown.
Now add the ginger garlic paste and stir well. Saute for 30 secs.
Follow with the chili powder and garam masala and saute for 30 more secs.
Add the grated carrots next and saute till it wilts.
Add cooked rice and salt and mix well.
Cook on low flame for 30 secs.
Garnish with coriander leaves.
Serve hot with any raita of your choice.
Tofu Tikka Masala Recipe| Side Dish For Rotis
So, the other day when i made a huge batch of tofu tikka, i had some remaining the next day. So i decided to make some tofu tikka masala. It pretty much works like paneer tikka masala and it made a delicious accompaniment for the garlic naan that i was serving that day. The brownie point is that you can always sub the tofu for paneer and vice versa or use other veggies like cauliflowers and broccoli to make this gravy. It works very well as a filling for wraps too.
Recipe For Tofu Tikka Masala
( Tandoori style cooked tofu in a creamy gravy)
Prep Time: 10 mins
Cook Time: 20 mins
Serves 2 generously
Allergy Info: Egg free, Gluten free
Ingredients
Tofu Tikka 1 recipe
Onion 1 large chopped finely
Garlic 4 to 5 cloves
Ginger 1/2″ bit
Green chili 1
Tomato puree 1/4 c
Oil 1 tbsp
Cumin seeds 1 tsp
Turmeric powder 1/2 tsp
Garam masala 1/4 tsp
Red chili powder 3/4 tsp
Coriander cumin powder 1/2 tsp
Chaat masala a pinch
Cream 1/4 c
Salt to taste
For Tempering
Onion 1 small chopped finely
Kasuri methi 1 tbsp crushed
Oil 2 tsp
For Garnish
Coriander leaves for garnish
Directions
Grind together the large onion, ginger, garlic and green chili to a fine paste without adding any water.
Heat a pan with oil.
Crackle the cumin seeds.
Now add the ground onion paste and saute till light brown and aromatic. Takes about 2 mins.
Add all the spice powders next and mix well.
Saute for 30 secs.
Add the tomato puree now and mix well.
Cook the mixture till oil separates.
At this point, add the tofu tikka and salt and mix well. Go easy with the salt as the tofu tikka already has some in it.
Add cream finally and mix well.
Let the mixture simmer for about 3 to 4 mins. If you find the mixture too thick, add about 1/2 c of water and simmer for another minute more.
Once done, switch off flame.
Heat another pan with 2 tsp oil.
Add the finely chopped onion reserved for tempering and the kasuri methi.
Fry till onion turns golden brown.
Add this to the gravy.
Garnish with coriander leaves.
Serve hot with any flatbread of your choice.
Works well with a pulao or a biriyani too.
P.S. You can make this a vegan version by avoiding the cream and substituting with cashew curd.
Jamaican Banana Layer Cake
Now, i have to tell you all about Marcy Goldman. True to the title, her book, A Passion For Baking, reflects her deep innate passion for baking in every page, in every image and every letter. Its easily a beginners guide and a professional baker s delight. Its hard to find a book that can be both, mind you. It also doubles up as a super baking book for a person like me, hanging in between. You know, the jack of all trades kind?
Our group of Avant Garde Cookies turned one this month. My! my. I cant believe that we ve been cooking along for a year now. So, we decided to have a blast this month by going overboard with food. We picked baking a layer cake with frosting et al for the first week. And i picked Marcy s book without batting a lash the moment the decision was made. Like i said, i was a little petrified at the thought of making a layer cake and frosting it too. But Marcy makes it sound like eating a cake itself so, i m here with my first cake. I dint want to make a chocolate cake. No, really, with no disrespect to chocolate lovers, i m not a chocolate person. And no, stop staring at the screen as though you are reading a mad woman s journal. Its ok not to be crazy about chocolate. But this one has chocolate frosting. So, i guess i ve made peace with you all.Lets move on to the cake,shall we?
Recipe For Jamaican Banana Layer Cake
( A two layer banana flavored cake with chocolate frosting)
Prep Time: 2 hours including time to frost
Cook Time: 30 mins for the cakes
Serves 7 to 8 generously
Yields two 6″ round cakes
Source: Loosely adapted from Marcy Goldman s A Passion For Baking
Ingredients
For The Cake
Flour 162 g
Sour Cream:
Amul cream 3/4 c
Lemon juice 1/2 tbsp
Sugar 210 g powdered
Eggs 2 large at room temp
Unsalted Soft Butter 112 g at room temp
Banana puree 1/2 c
Baking powder 2 tsp
Baking soda 1/4 tsp
Vanilla extract 1 tsp
Rum extract 1.5 tsp
Cinnamon powder 1/2 tsp
Salt 1/4 tsp
Dry dessicated coconut 1/4 c divided
Chocolate chips 1/4 c
Banana slices from 2 large bananas.
For The Frosting
Unsalted soft Butter 1/2 c (115g)
Confectioner s sugar 2 to 2.5 c
Milk 2 tbsp
Cocoa powder 1/3 c
Directions
Lets make the cakes first.
Take two 6 inch round pans and grease generously. Set aside.
In a mixing bowl, combine cream and lemon juice, whisk and set aside.
In a large mixing bowl, sift together flour, salt, baking powder, baking soda, and cinnamon and whisk well.
Preheat oven to 180 C for 10 mins
In another larger mixing bowl, cream butter and sugar with an electric whisk until fluffy.
Now add the cream and whisk well again until well incorporated.
Break the eggs in next and add the rum and vanilla extract.
Whisk the mixture well until frothy.
Now, add the banana puree and whisk again till incorporated.
To this mixture, add the flour mixture in two batches, folding in the mixture into the wet mix gently every time you add a batch. I used a silicon spatula to fold.
After you add the second batch and you ve folded, make sure you see no dry flour mixture anywhere at the bottom or the sides of the bowl. If you find any, scrape and fold again.
Now, whisk the batter on low speed with an electric beater for about 1 minute until you see folds in the batter.
Once done, add the chocolate chips to the batter and mix. But take care not to over mix the batter or you will have dense cakes.
Pour half the batter into one of the prepaped pans and the other half into the other pan. Your pans must be half full.
Sprinkle the dry desiccated coconut on the top of each pan.
Now, i dint want my cakes to crown. So i covered the tins with a tin foil sheet before i put them for baking.
I would recommend doing this as we ll be frosting our cake.
Once you cover the tin with foil, bake for 30 mins or until a skewer inserted comes clean.
Once done, take out and let cool completely.
Now comes the difficult part. Either to slice away and eat or to let cool further and frost. The choice is absolutely yours but remember the gorgeous chocolate butter cream before you make a choice.
Once the cake cools down, put it in the fridge for a good 3 hours.
Cold cakes are easier to frost.
At the end of the third hour, get started with the frosting.
In a mixing bowl, place the butter, sugar and the cocoa.
Whisk well until fluffy and incorporated. An electric whisk works best for this.
You need to have a thick spreadable consistency of the frosting.
Once the ingredients get mixed well, add the milk and run the whisk on high speed for about 2 to 3 mins.
This is for getting an uber smooth butter cream.
Once done, bring the cakes out.
Place the cakes on an elevated surface on the plate in which you will display the cake. You cant possibly be shifting around the cake easily once you begin frosting it.
Place one cake on the plate.
Now, take about 1/4 c of the icing and spread carefully on the top.
Gently arrange the slice of banana over the iced layer.
Now place the other cake over this.
Now, gently put a dollop of the frosting on the top and spread evenly with a spatula.
When you start frosting the sides, place some frosting on the top of the layer and gently drag down the sides to spread. I apologise for not taking pictures but this is my first time too and i was concentrating completely.
Make sure you cover the entire cake with frosting.
Even out the frosting with a spatula in the end.
You can do something fancy if you have it in you on the top of the cake.
I had some icing remaining and i piped them as roses on the top.
Once done, leave the cake in the fridge for half an hour for the icing to set.
Slice and serve.
P.S. Use of rum extract and coconut is optional but i wanted the full jamaican impact so opted using the both.
You can also use coffee instead of rum.
The cream may curdle when you add lemon juice but there s no need to panic.


